Native app instructions
To install the app
In order to install the waveOut beta app you will need an iPhone 7 and later versions with the iOS 14.4 and later updates, or the Android version 8.
The waveOut app can be downloaded to
iPhone at: https://apps.apple.com/in/app/waveout/id1496541182
or to
Android at: https://play.google.com/store/apps/details?id=io.dreamwaves.waveout
First app launch
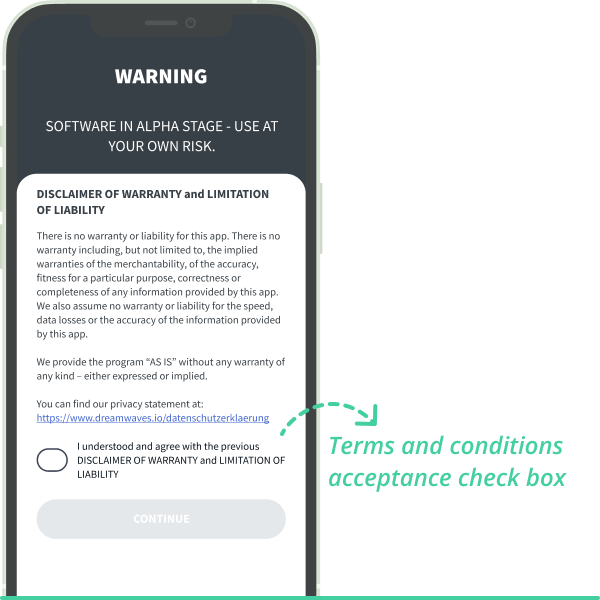
The first time you launch the app for the first time, you will be prompted with our terms and conditions (fig.1); in order to start using waveOut, you will need to accept them using the switch button.
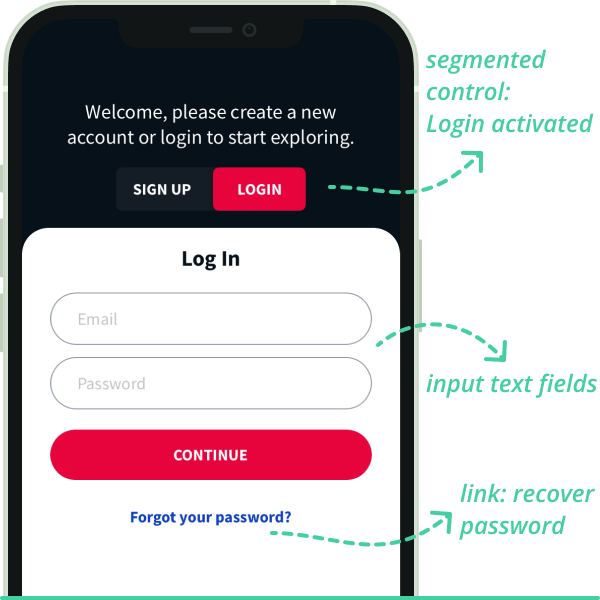
In order you use waveOut, you need to be logged in. If you already have an account for the waveOut web planner or mobile app, you can Login; otherwise you can sign up and create your user account (fig.2). By logging in, you will also have access to your search history and your saved routes and places.
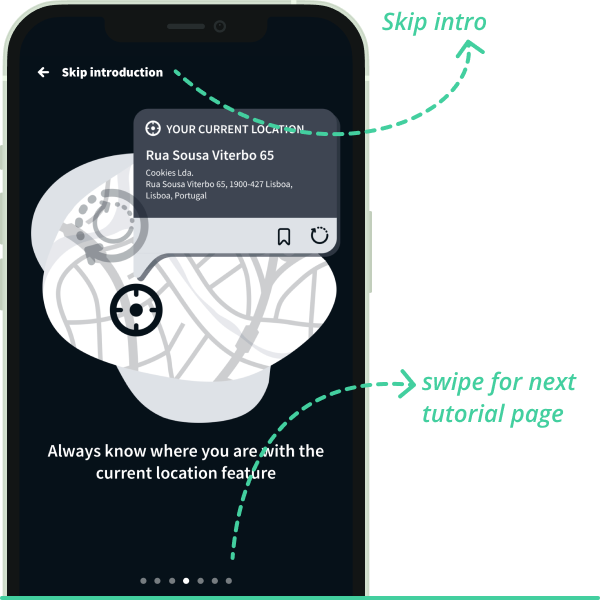
If you are new to the app, a tutorial will automatically start; it will guide you through the waveOut app and its awesome features! If you can't wait to start exploring on your own, you can interrupt the tutorial at any time and get back to it later, selecting Tutorial from the Settings menu (fig. 29).

Signing up
To create a new account, select the Sign up button, from the top menu (fig.2). Enter your full name, email, password and the password confirmation in the text fields.
Submit your data tapping the Continue button and the waveOut support team will send you a confirmation request in your inbox. Confirm your registration you start exploring the world with waveOut!
Login
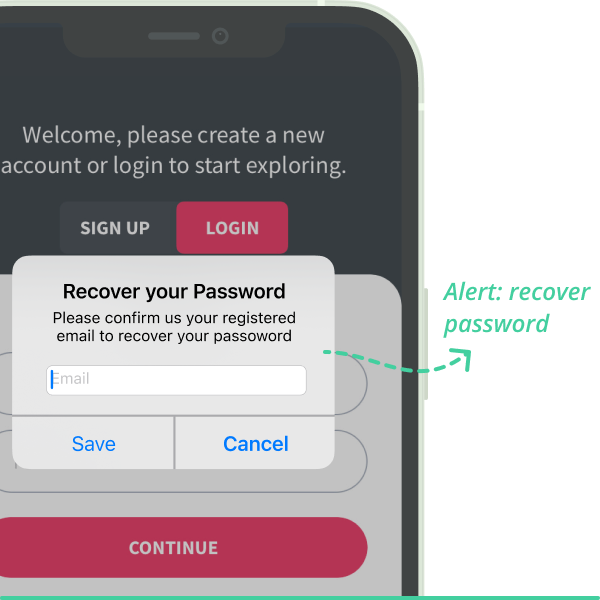
If you already have a waveOut account, you can login by selecting the Login button (fig.3) from the dedicated top menu. Enter your email and password on the dedicated text fields and tap the continue button. If you forgot your password, click on the forgot your password button (fig.4) to recover it.
Using the WaveOut App
Welcome screen and Search screen
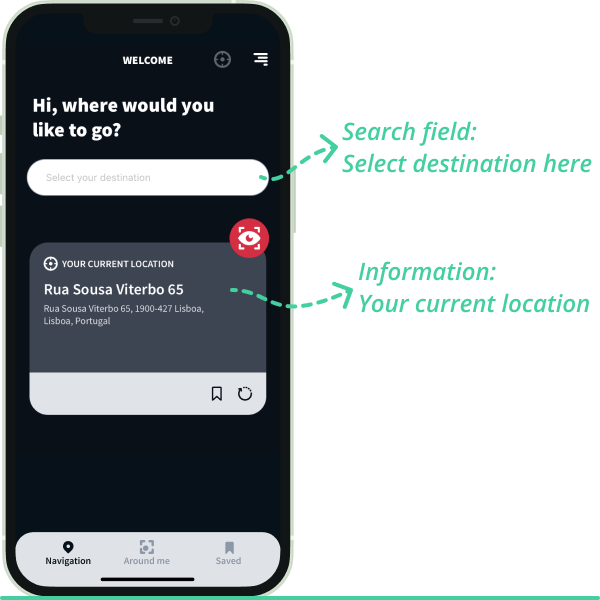
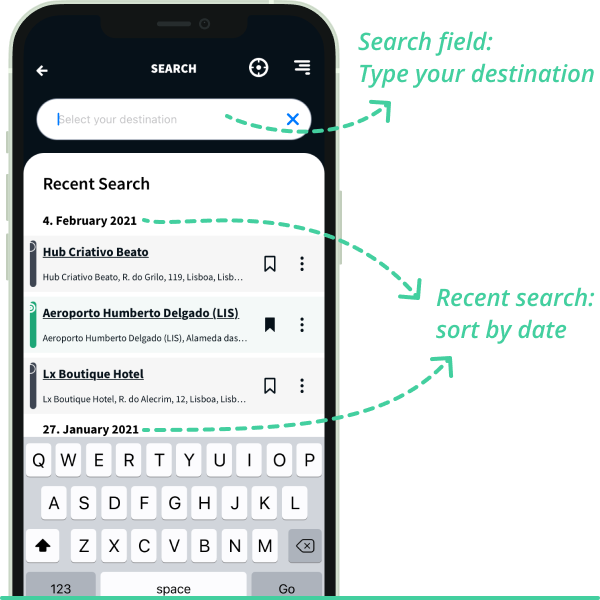
In the Welcome screen (fig.5) you can enter your destination by typing it in the select destination search field. Selecting the destination search field, will bring up the Search screen (fig.6).
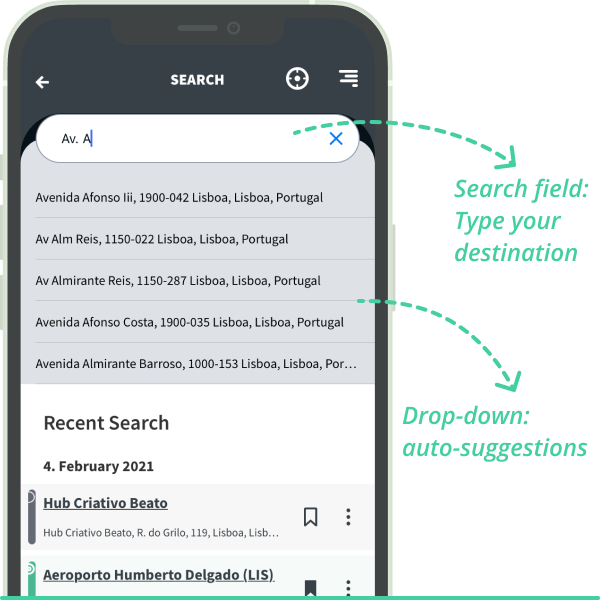
From here you can select one of the recent search results (sorted in descending order by date) or enter a new destination. As soon you start typing, an auto-suggestions drop-down will appear (fig.7); by selecting one of these auto-suggestions you will land on the Itinerary selection (fig.8).

Itinerary Selection
The Itinerary selection page will allow you to choose the desired route. Selecting one of the suggested routes, the navigation will start.
You can also refine the route search, with the help of the different screen elements: Schedule route button: this element shows the time and date for which the route suggestions are calculated; by default, the departure time is set to the current time and day. Selecting this button, you will be able to change the departure or arrival time and date (fig.9).

Route type control: this element will allow you to filter your route by type. We have available 2 different types of routes:
- pedestrian: it will provide the best available pedestrian routes.
- bike rider: it will provide the most convenient bike path routes. They also include walking directions, whenever there is no bike path available.
Invert your starting point and destination button: tapping this button will swap the current starting point with the destination and vice-versa.
Calibration
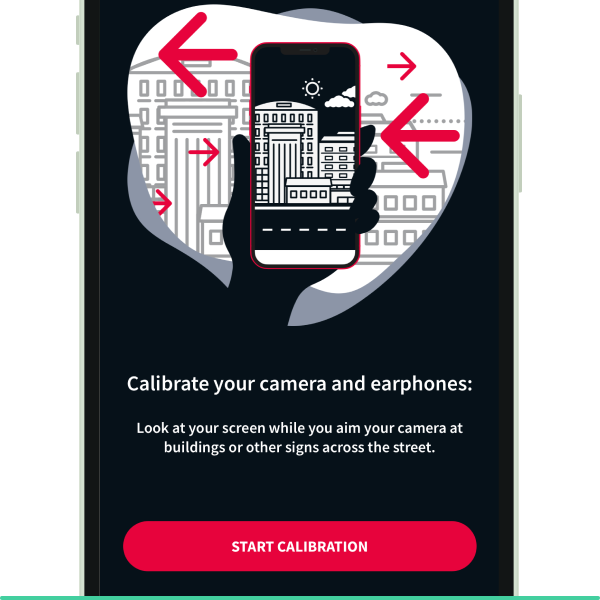
When a route is selected, the user will be automatically taken to the calibration screen (fig. 10). Here, the user should calibrate their earphones using the camera. To do this, they should hold their phone upright and aim the back camera at buildings or signs across the street while looking straight at the phone screen and wearing earphones. Any earphones will work with WaveOut, but for an enhanced experience, we recommend using Apple AirPods Pro. With AirPods Pro, the user will be able to use the app in the background without needing to use the camera during navigation.
Navigation
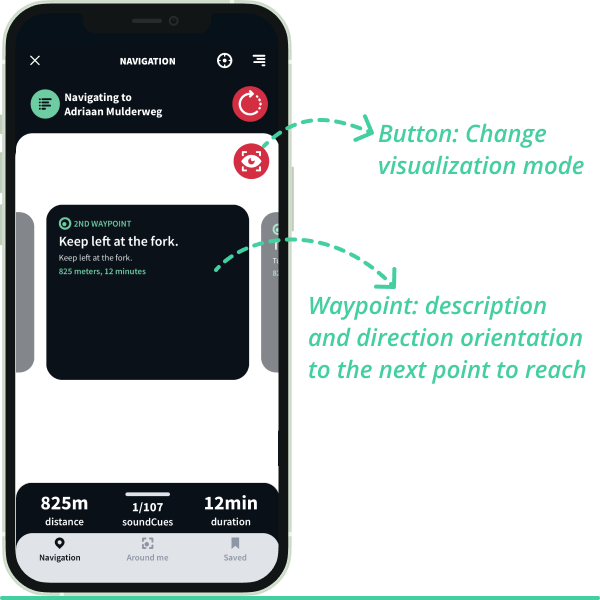
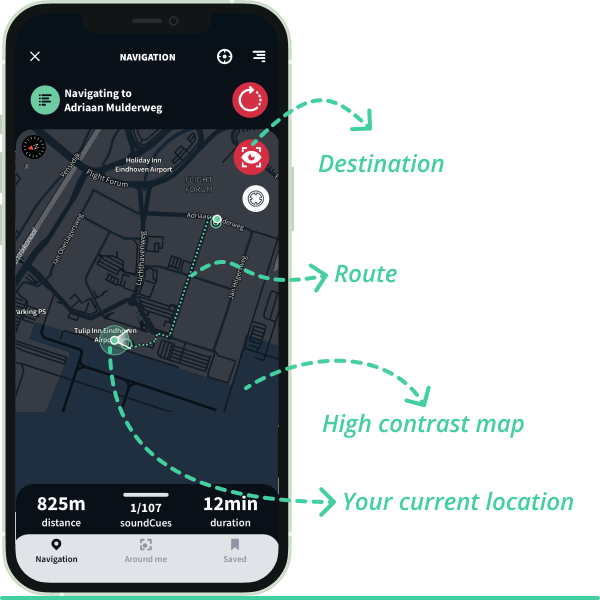
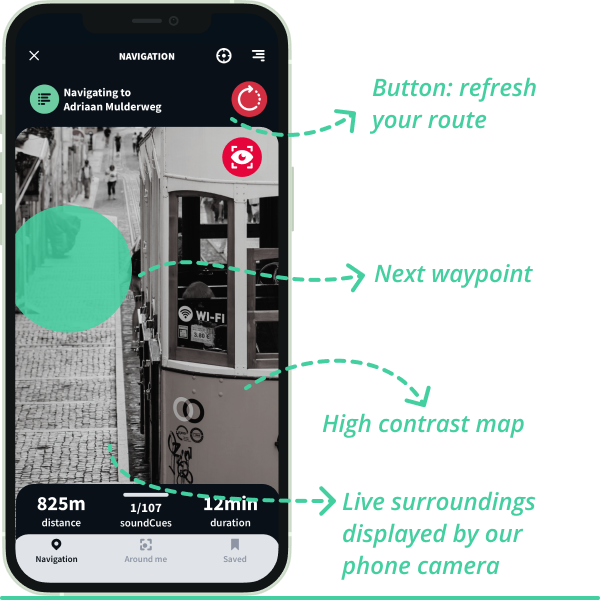
You can choose between three different visualization modes, by tapping the change visualization mode button (fig.11):
Text instructions (fig.11): this mode is designed specifically to be explored while navigating using voiceOver (voice screen reader). You will be able to access the description and the orientation of the way-points along you will need to follow to reach your final destination.
High contrast map (fig.12): this mode displays your route on an high contrast map; we designed it for optimal legibility. The map view gives you an overview of the route, showing your navigation progress in real time.
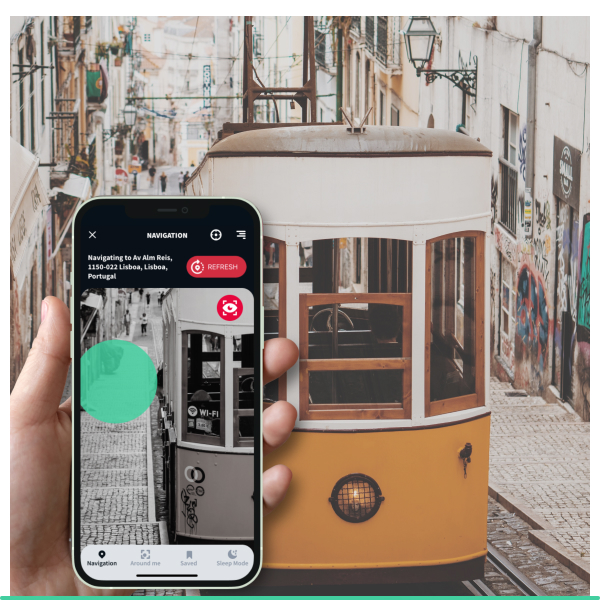
Augmented reality (fig.13): with this mode, you can see the way-points you need to follow, placed live in the real world; this view is ideal to briefly verify that you're on the right track. Please keep your phone down and always be mindful of your surroundings when using WaveOut!
Regardless of the visualization mode you choose, you will always be able to hear the navigation cues. For an optimal experience, we recommend that you use headphones to follow the sound to your destination. Currently we are not tracking the orientation of your head; the sound that you will hear is relative to where the camera on your phone is pointing. We suggest that you either hold the phone in your hand facing forward (fig.14) or hang it around your neck using a lanyard (fig.15). For WaveOut to take you reliably to your destination, it is important to make sure that at any time the camera on the back of your phone is not obstructed and that the lens is clean.
If you're using Apple AirPods Pro, we can track the orientation of your head. In this case, you no longer need to keep your phone camera on, and you can have the app running in the background.

Bottom tab bar
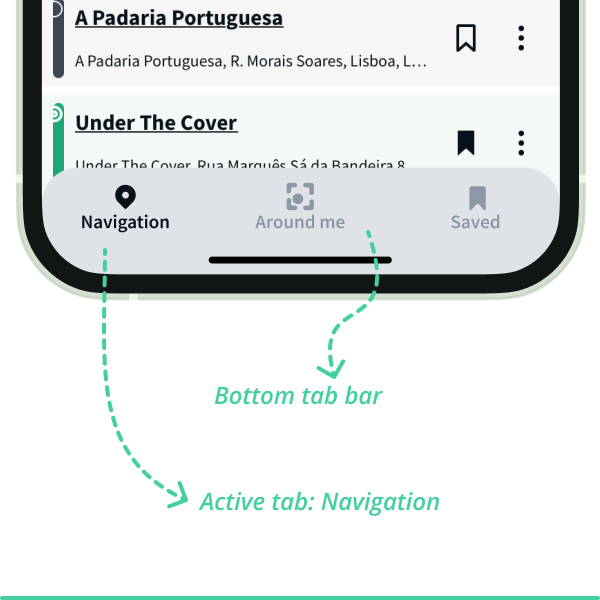
The tab bar (fig.16) is located at the bottom of the screen, and is accessible at any time.
The bar will give you quick access to four useful tabs:
Navigation tab (fig. 16): this tab is active by default. From here you will have access to all the WaveOut navigation functions, from planning to following a route.
Around me tab (fig.17): the “Around me” screen will give you information about points of interest that are nearby you.
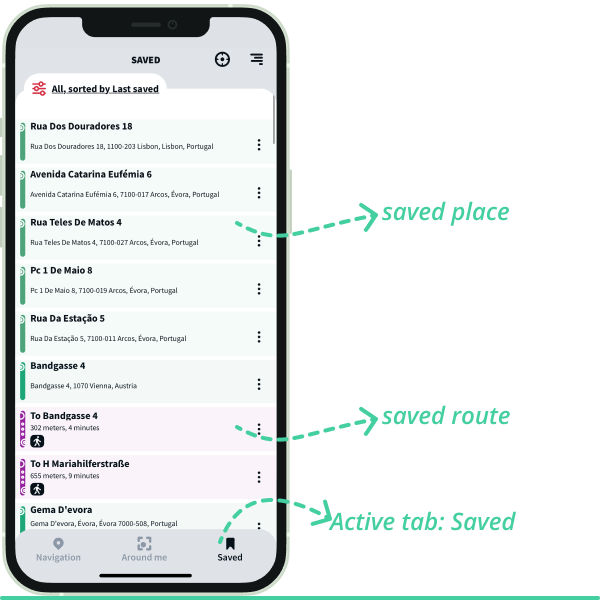
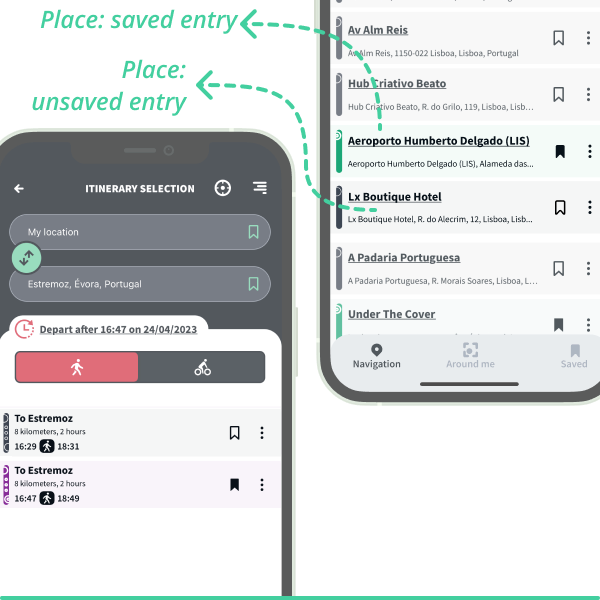
Saved tab (fig.18): lets you access the Saved screen, which contains a list of the places and routes you saved.
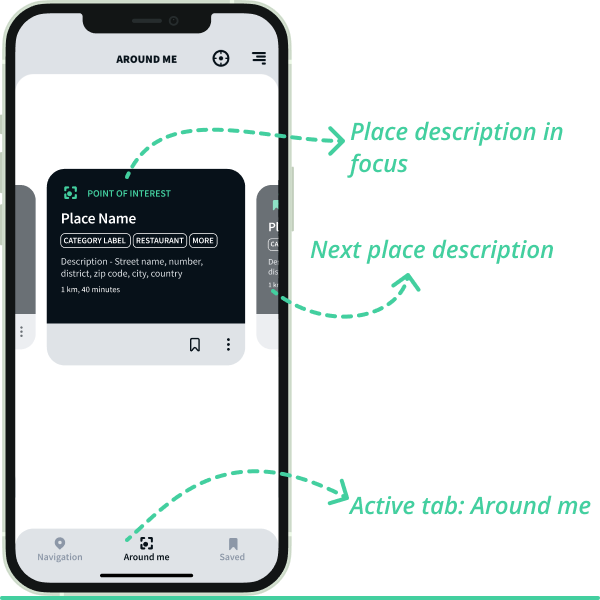
Around me screen (fig.17)
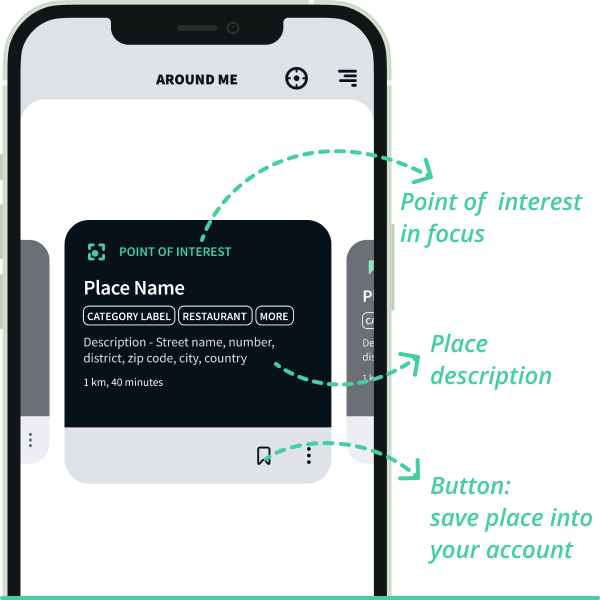
On this screen you have access the different interesting places (fig.19), which are nearby your current location.
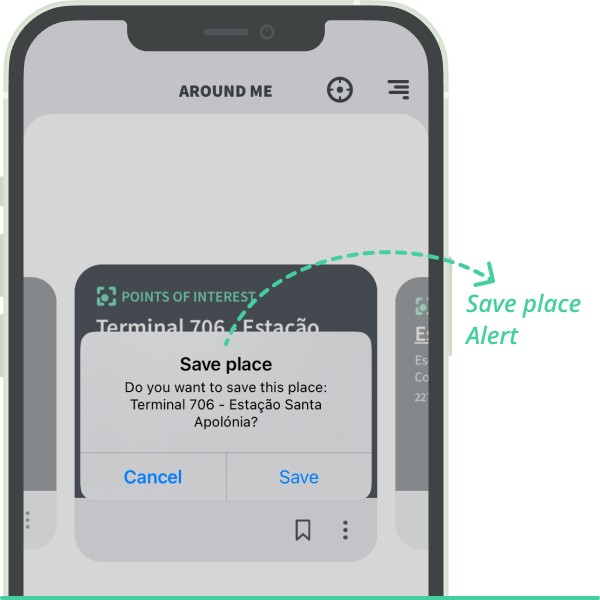
For each different place you can: know its precise address, see how far it is from you, navigate towards it, save the place for later (fig.20).
Saved screen (fig.18)
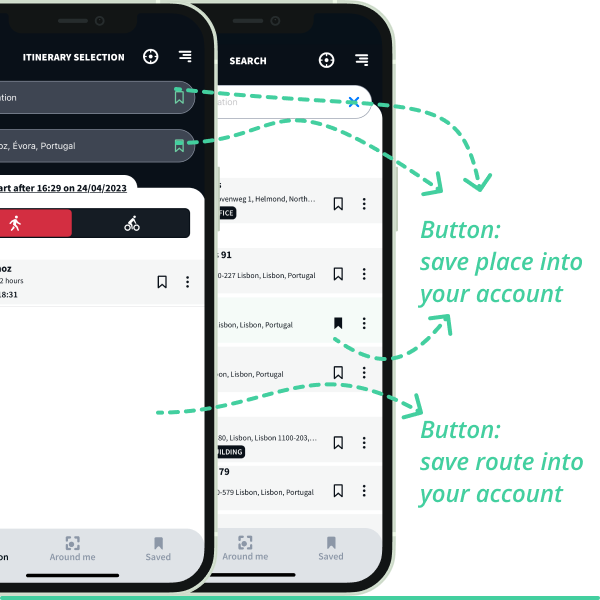
You can save anything by tapping the save place or route button that appears shown next to places or routes throughout the app (fig.21).
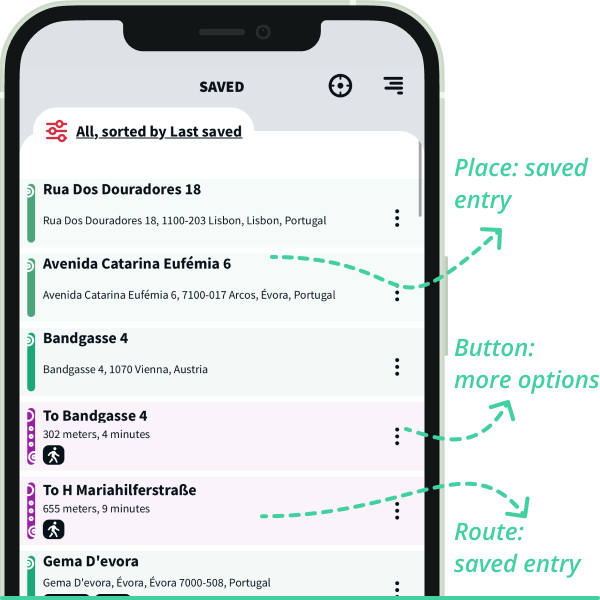
The Saved screen shows you all the places and routes that you have saved in your account. Places will be shown with a customizable name and their address, while routes will also display information about their length, time to destination and type of routing - walking or cycling (fig.22).
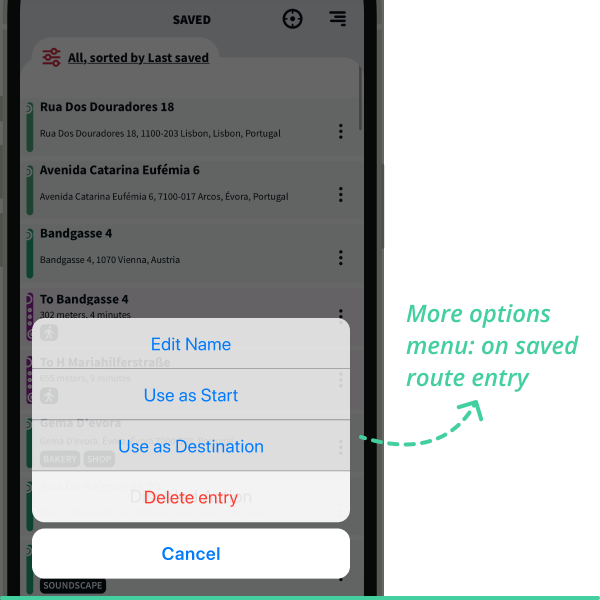
Selecting the more options button shown next to each entry, you will be able to use it as starting point or as your destination (in the case of a saved place), start the route and see its details step by step (in the case of a saved route) you can also edit its name and even delete the entry from your account (fig.23)
You can easily recognize which entries are already saved and which aren't. We differentiate then with specific color coding and iconography (fig.24).
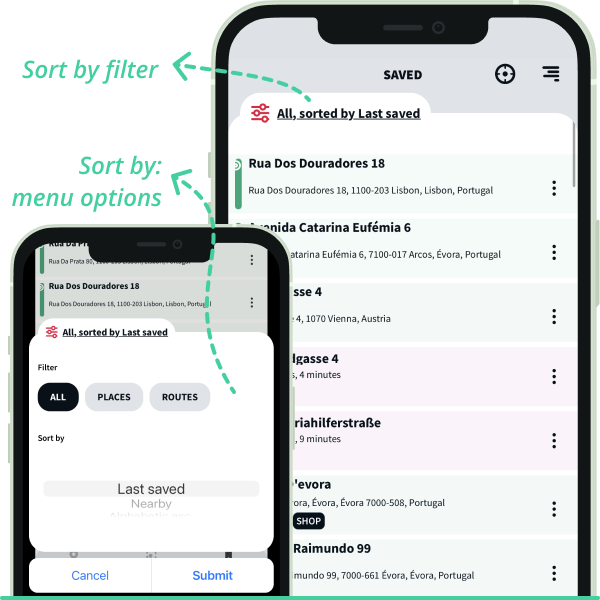
For easy access to your saved entries, you can sort them by (fig.25):last saved, nearby, alphabetic order (descendent and ascendent), only places, only routes and all.
Current location
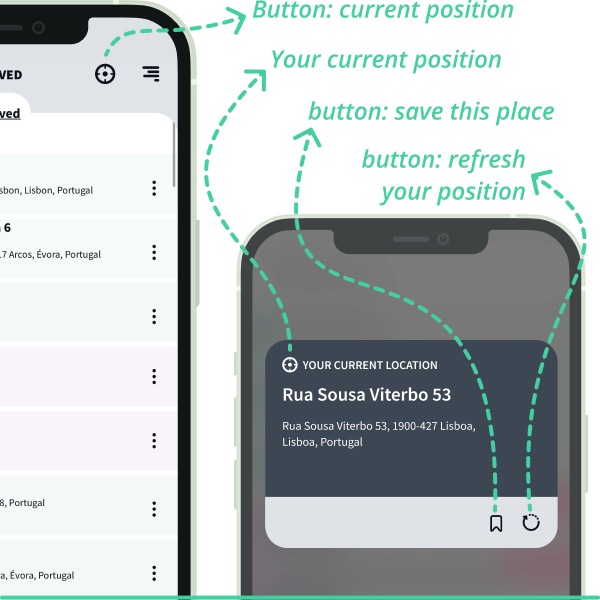
You can at any stage check your current location by simply selecting the open current position button (fig.26).
This button is located on the app header, top right position, always available through the app interface. It displays your precise current address, you can save it in your account and also refresh it at any time.
Your current location is also always indicated on the welcome screen (fig.5).
Settings
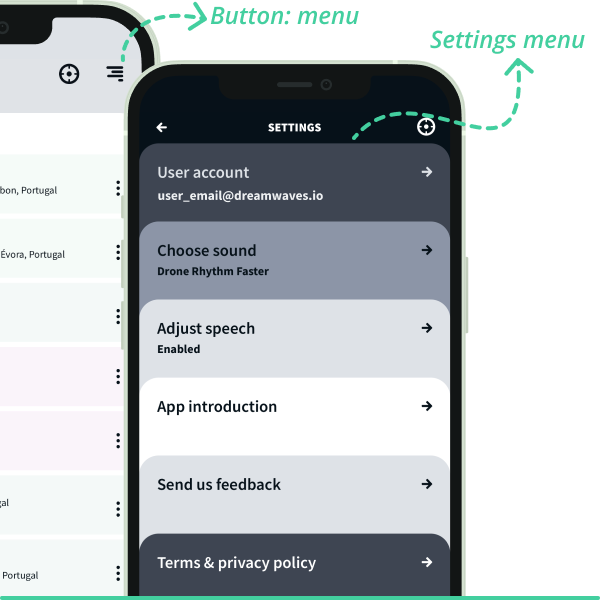
Right next to the current position button, you can find the open menu button, it will lead you to the settings screen (fig.27).
Here you will be able to:
- Logout from your current account and log in again.
- Choose between 3 different sounds. This sound is what you will hear coming from the points you need to follow on the street, during navigation.
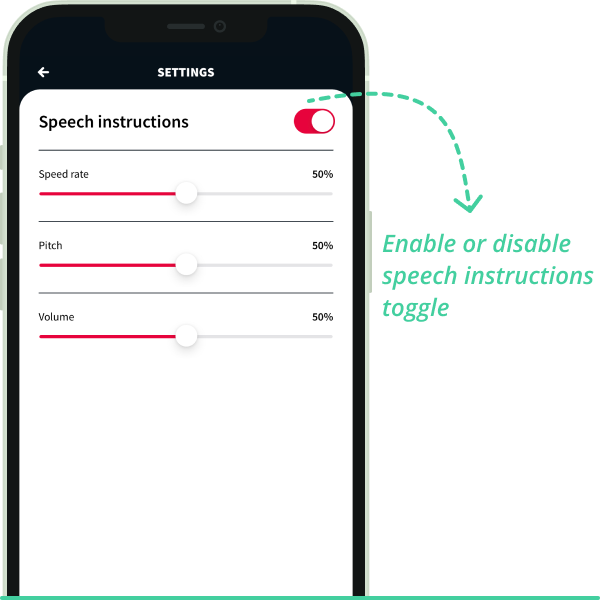
- Adjust the speech instructions (fig.28), like the seep rate, the pitch and even the volume these commands are displayed on the app. you can also enable or disable this feature from your navigation.
- Watch app introduction (fig.29). Here we give you fast tips and clarify the basics on how to use waveOut app. You will have access to them as soon you start the app for the first time.
- Sends us feedback. We love suggestions and criticism! We hope to get your input on our app, just write us some lines on this section.
- Have access to our terms & privacy policy. You can always contact us directly if you have any doubts or concerns regarding the topic.
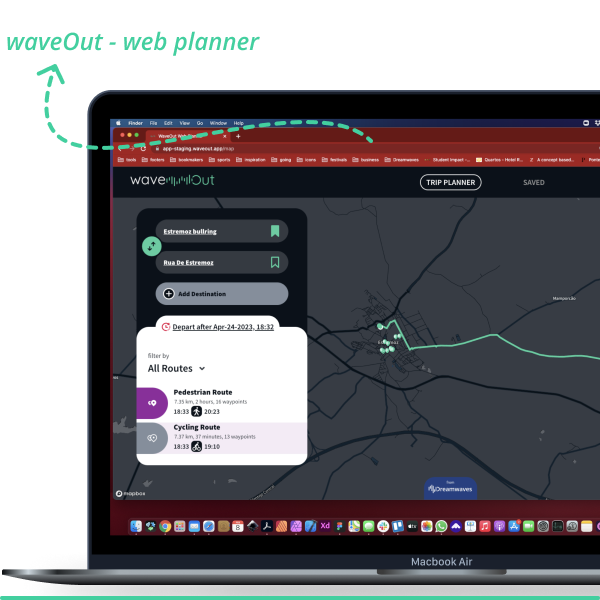
Web planner (fig.30)
Additionally, a companion web planner can be used. This desktop web version, was especially thought and designed to allow you to plan your trips easily and comfortable online, on your desktop.
Afterwards you might save these routes on your account and use them later on your waveOut app.
They will be synchronized with the mobile app. You just need to use the same credentials to login both versions and load the route or place information from your saved screen.
Access your waveOut web planner here.